Mermaid Necklace Pendant Art Jewelry With Ball Chain Mermaid Treasure Chest
Making gorgeous one-of-a-kind works of art from broken, vintage costume jewelry is not "difficult" — simply it requires a lot of patience — a lot of jewelry — an artful eye — and the advisable adhesives. While Denise was at my house helping to faux bois paint my woodwork, nosotros spent a crafty evening — five hours!!! — making framed artwork from my stash of broken jewelry, collected over the past few years at estate sales and thrift shops.
Read on for my tutorial, additional tips, and to run across my springtime creation, too. >>>
Stride #1: You demand a lot of jewelry
Don't even think almost starting this project unless you lot have lots of jewelry. As with making vintage Christmas ornament wreaths, the more jewelry you have on hand to work with, the easier it will be to create an artful project.
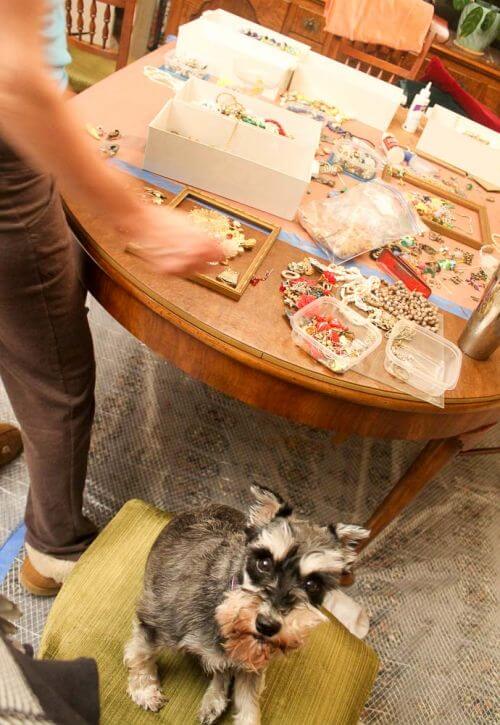
To a higher place: I had six shoe-boxed size containers full of cleaved jewelry that I had nerveless, thinking that some 24-hour interval shortly I would make a vintage costume jewelry Christmas tree (meet these 17 examples in a recent story — gorgeous!) For this crafting circuit, we decided to attempt the art form to make something else … Christmas is a long fashion off.
- Tip: Look for broken jewelry at estate sales and thrift shops. You lot tin can even enquire the estate auction organizer or thrift store possessor, "What do you lot exercise with the broken jewelry?" and tell them you'd similar to buy it.
Above: Denise's mini Schnauzer "Bug" thinks she's a mount goat. She climbs everywhere. She and Astro had a fantastic time playing.
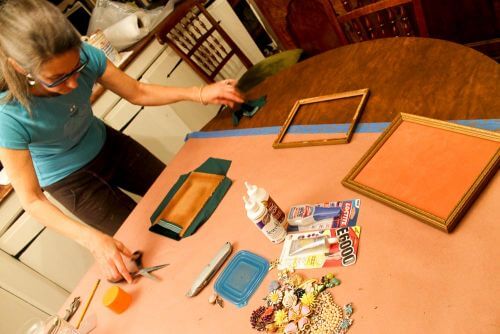
Footstep #two: Gather your supplies, including an adhesive designed to permanently stick metal to fabric
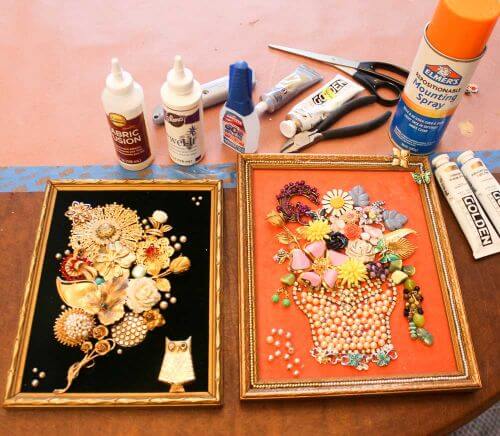
Supplies yous'll demand for this project, in addition to the jewelry:
- Vintage frames — I doubtfulness that I would ever use a new frame for vintage jewelry — the vintage-on-vintage really ups the everything factor.
- Velvet for the backing — I even use vintage velvet I've picked up at manor sales, I am just that way.
- Adhesives that will stick metallic permanently to fabric, drying articulate. Because I did not program ahead so I could society on Amazon, I took a trip to Michael's to buy agglutinative the day we did our project. They had a groovy chart that showed which adhesives to use for which types of projects. For this one, I chose several glues that would permanently adhere metal and cloth.
- For this project, Denise tested Aleen's Jewel-It Embellishing Glue. Notation: All the links out to Amazon in the post are chapter links — part of how I make money on the web log.]
- I tested Aleen's Textile Fusion.
- Annotation, both of these adhesives seemed to work fine; more on using these adhesives later.
- Utility knife and pliers to dis-assemble the frame, if required — use safety spectacles [$.25 may fly; glass may non be tempered — exist conscientious!].
- Scissors to cut your velvet and to cutting the paper-thin or matte lath to size to fit your frame (if a backer board is not already in your frame)
- We used Elmer's Repositionable Mounting Spray to attach the velvet to the substrate (paper-thin or matte board). You want to exist careful not to use an agglutinative that volition drain through to the forepart of the fabric. Denise, an artist, thought the mounting spray would be fine.
- Wire cutters to trim the dorsum of cleaved jewelry if you demand/want it to lay apartment. Be safe: Wear safety glasses when you are wire-cutting the jewelry so that if an its or bits flies, information technology doesn't fly into your optics.
- Once into the project, Denise said we actually should have had calipers to exist able to agree and position the jewelry precisely. Amazon also sells calipers in nifty looking jewelry-making sets (y'all know I volition have to try jewelry-making using built-upward pieces of cleaved vintage jewelry soon; I may get ane of these kits before long, although for now I find some satisfaction in dialing upward the degree of difficulty past forcing utilize of my fat fingers. Or fifty-fifty just something like these:
- Nosotros too used iridescentGilded paints to brighten up parts of the frame, merely in an antique-y kind of way.
- Hardware to hang the art or your solution of choice to display information technology.
Footstep #3: Prep your frame and cloth
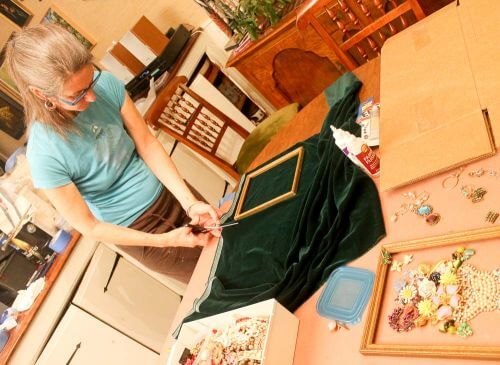
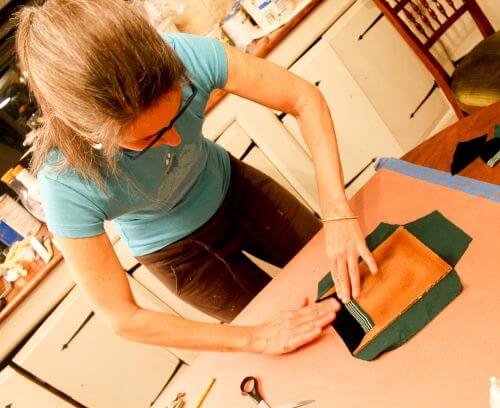
Higher up: Denise — who has a degree in art and is a professional decorative painter — shows how to properly miter the velvet onto the backing. Her frame came without a backer board, and so she cut a new one to size using plain cardboard. It was substantial enough.
My frame had drinking glass and an onetime print of no value in it. I carefully removed all. Be enlightened of potential safety issues, such equally old drinking glass may not be tempered… metal pieces may fly or the glass may break when you are working with it, to wear safety glasses… onetime pigment on the frame also may contain lead. Be Condom/Renovate Prophylactic.
In addition, my frame came with a capitalist piece, so I used that. Note, though:
- Tip: Before gluing, be sure your back will fit the frame once the thickness of velvet is added.
We used repositionable mounting spray to become the fabric onto the substrate. Read the directions and follow them — for example, we sprayed outside considering the stuff is pretty baneful smelling.
But now, accept note: Practise not put your backboard into your frame permanently … You are going to adapt your pieces in the empty frame kickoff, keeping your velvet backer close at hand so that, every bit you go, you lot tin eyeball how the jewelry will expect on the textile.
More steps follow!
Meanwhile: Desire more than kitschy crafties? Check out our famous tutorial to brand a Christmas ornament wreath — and video:
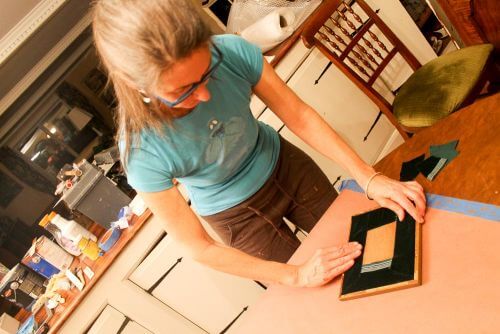
Footstep #4: Suit your slice inside the empty frame

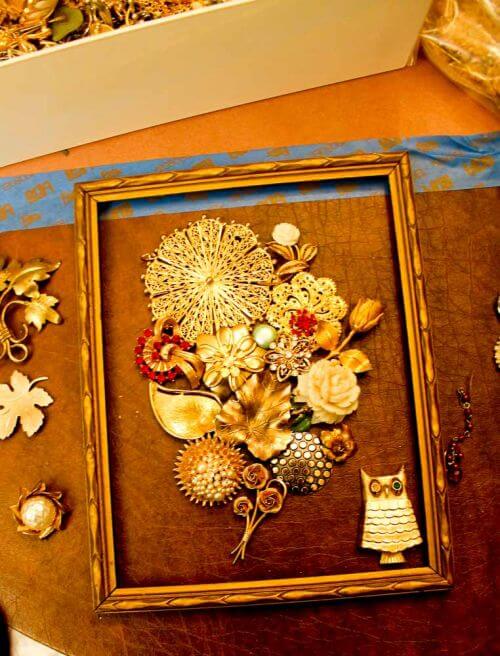
Now the fun begins! Start playing with your jewelry to get the composition you desire. We did this inside the empty frames to get the balanced limerick nosotros wanted. We did not do the blueprint piece of work on the existent velvet because we did not want to go the velvet dingy.
That said, as you lot are doing your design, it's imperative that you lot go on the velvet color in mind. Volition your jewelry await expert on it? That's a super important factor.
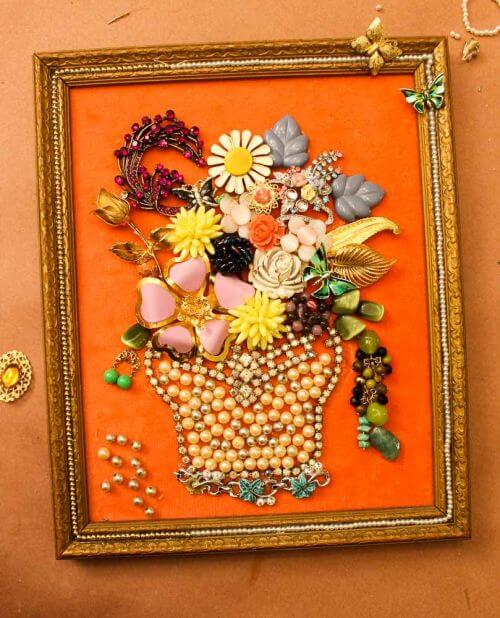
- Tip: If you are making a multi-color design — similar I did — make sure y'all include a few pieces of jewelry that match your cloth colour equally closely every bit possible. Fortunately, I had a a piece of coral-colored jewelry and ane coral-colored bead that I could add. Ideally, I would have liked 3 pieces — because odd numbered-matches are more visually dynamic.
Other design tips:
- Respect the white aka negative space. The empty space not decorated. As with any limerick, you are going to aim for a good sense of balance, proportion, motion, colors, discipline matter — all at the aforementioned time.
- A expert style to get started: Stick to one principal colorway — similar, aureate — then piece of work in only modest bits of two more colors. That's what Denise did: Gold with wee bits of aqua and ruddy. Very pleasing.
- The other good mode to go started: A boutonniere, like I did. Even so — it may exist that less is more — edit your flowers, keep your "vase" or "stem/s" simple, and because narrowing your colors according to the principals of the color wheel.
- Respect the white/negative space. Yes, I'yard repeating it. Your empty space is part of your design, your frame inside a frame.
I only had three colors of vintage velvet to work with — dark green, coral, and burgundy — so nosotros chose our jewelry designs accordingly.
Pace #5: Commit with your glue
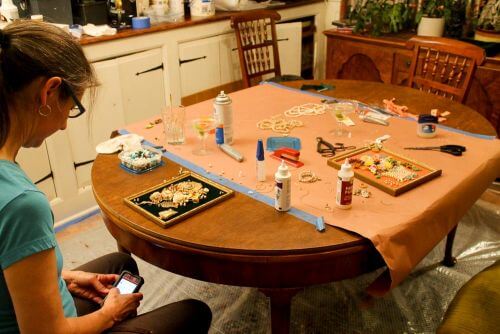
Before committing to putting the piece on the frame, Denise took a photo of her off-to-the-side piece with her iphone. I was a little more freestyling, for one time.
Our experience with the Aleene'due south Precious stone-It and the Aleene's Material Fusion, the two glues we used:
- They both stale very slowly, which is fine… but which means that if you are going to layer stuff, yous demand to prop the college pieces upwards to allow time for the glue to harden. This is not similar high-rut hot glue, which dries very speedily.
- Mine left a snail-track where I had to movement a piece of jewelry. Non horrifically. Merely take note, go slow.
- Information technology took a lot of glue — I used information technology very generously to ensure good adhesion. I used at to the lowest degree 1/three of my canteen for my relatively small slice.
- Hardened upwards clear.
- Hardened up strong!
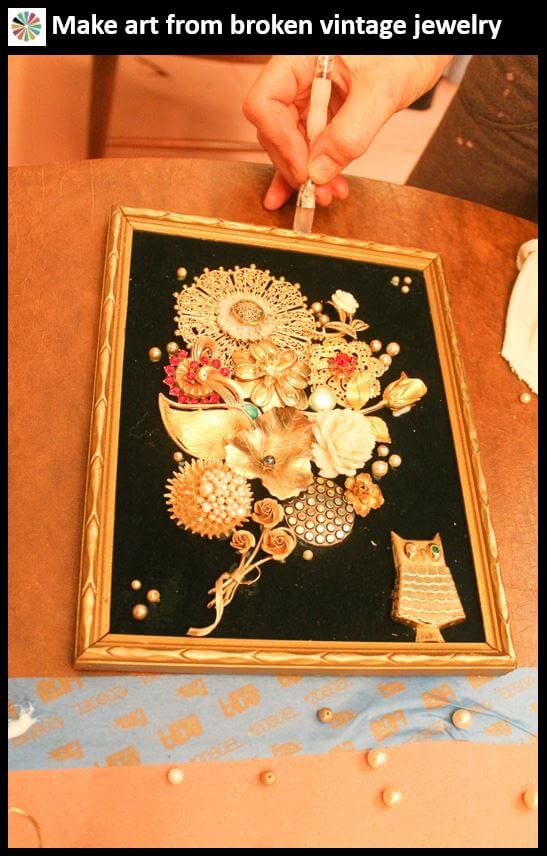
Stride #6: Take a break… stand back… then fill in the gaps… add a bit more bling… gild your frame, etc.
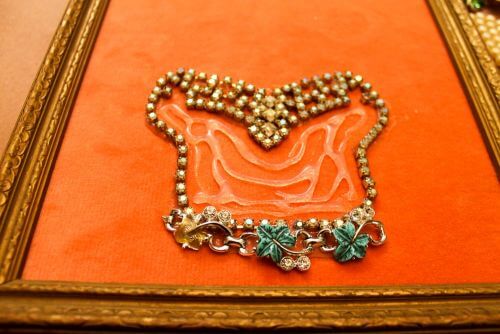
Higher up: Denise I suggested that I add together the small bead chains inside the frame itself. Working right onto the frame is as well a cracking way to add more dimension to the piece.
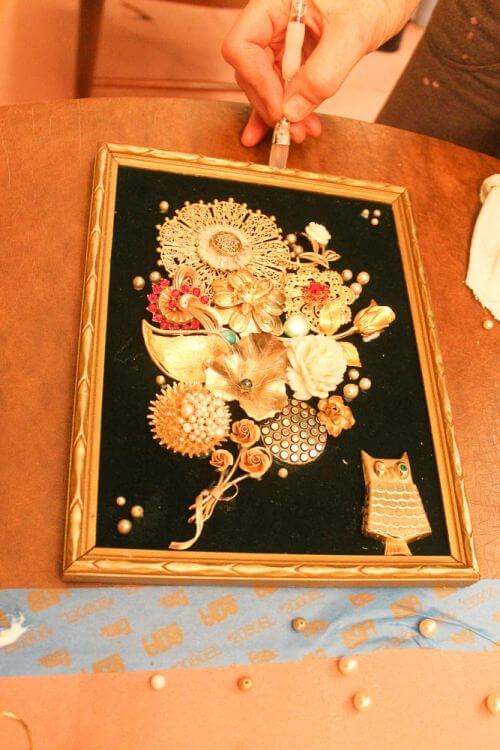
To a higher place: Denise used my irised golden Gold pigment to lodge her frame a bit <<these metallic Gold paints rock my world. Look: The Denise's frame is framed with deco fishes — they really popped when she gilded. I so did the same to mine — just with a very light hand — we even so wanted the patina of vintage.
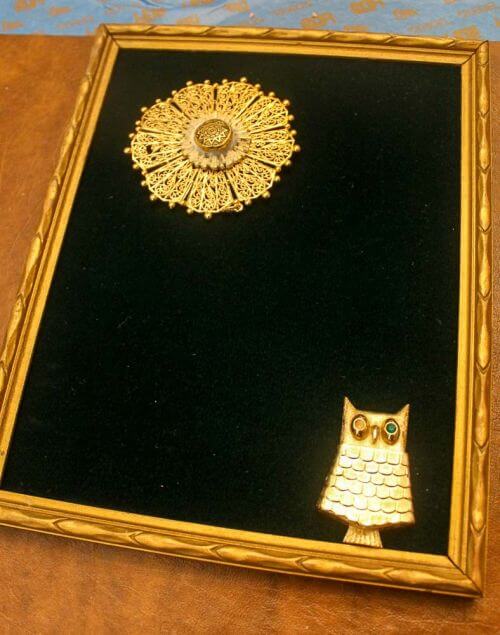
She also added the "polka-dot" pearls and other picayune beads here and there subsequently the main composition was glued down. For example: The Avon owl originally just had ane greenish center. It now has a second, pearl centre.
ALL OF THIS: After the chief compositions were adhered to the velvet…. Take a break. Walk away. Have a breath. Have a snack. Have a walk. Come back with fresh eyes and see what else your piece may need.
Information technology took the states five pretty intensely focused hours to make these. We did accept a 15-minute break to shove some sushi down our pie holes.
Information technology was super fun. We were pretty ecstatic about our vintage costume jewelry creations!
Social media time!
Hey, we fifty-fifty cleaned equally nosotros went along… Yes: Vintage jewelry threw up in my dining room — just for once, not long enough for my married man to go alarmed (howdy Kate, I miss you so much!)
Pace #seven: Did the glue work?
The next morning, we both rushed straight to the dining room table (before coffee even!) to meet if the gum solidified overnight. It did! We made fine art!
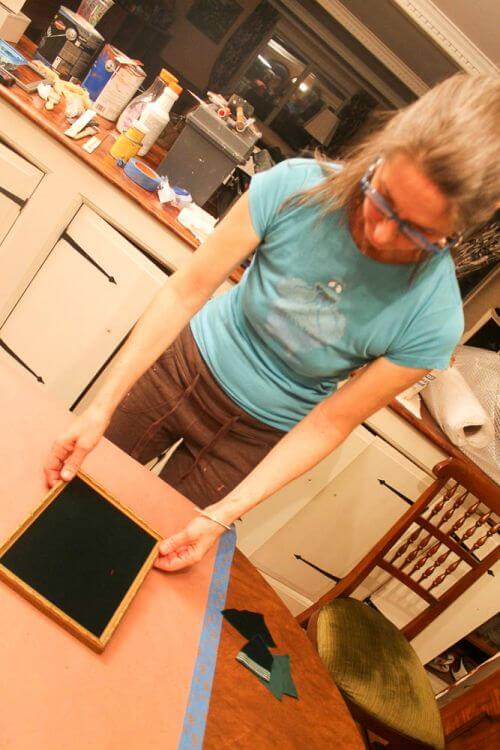
Step #8: Secure your canvas to the frame and finish the back
I am then exhausted from writing this story. I'll add a photo later. Merely cut to the chase: Once you lot are certain your jewelry is secure, you can secure the sail to the frame and finish the back. We did this afterwards the artwork was all done. But, you could do it before you glue on the jewelry — that would be somewhat easier — although if y'all are gluing the velvet canvass to the frame, y'all are then"committed".
To secure her canvas, Denise glued it to correct to frame. She said to be careful non to use too much glue or it might urp onto the velvet on the forepart. She suggested "dots" of glue. You could besides employ tiny nails or staples … or perhaps a heavy tape.
Denise so cut and adhered a piece of kraft paper to the back (I will apply vintage wallpaper!) and finally, added a hanger.
Not crafty?
I found these sellers on etsy who tin can evangelize y'all artful vintage jewelry beauty quick equally you tin slap down your paypal:
- Vintage jewelry art from Vintage Redo
- … from Not Too Shabby Pattern Co
- … and from Dazzling Merrie
Source: https://retrorenovation.com/2017/02/27/making-art-broken-vintage-costume-jewelry/
0 Response to "Mermaid Necklace Pendant Art Jewelry With Ball Chain Mermaid Treasure Chest"
Postar um comentário